HashMap
- Map인터페이스에 속해있는 컬렉션
- 키 : 값 - 1 : 1
HashMap 선언
import java.util.HashMap;

public class HashMapDemo {
	public static void main(String[] args)  {
		HashMap hm = new HashMap(); // 타입 설정x Object 입력
		HashMap<Integer, Integer> i = new HashMap<>(); // Integer, Integer 타입 설정
		HashMap<Integer, Integer> i2 = new HashMap<>(i); // i의 값을 i2에 카피
		HashMap<Integer, Integer> i3 = new HashMap<>(10); // 초기용량 지정
		HashMap<Integer, Integer> i4 = new HashMap<>() {{ // 변수 선언 + 초기값 지정
			put(1, 100);
			put(2, 200);
		}};

		HashMap<String, String> str = new HashMap<String, String>(); // String, String 타입 설정
		HashMap<Character, Character> ch = new HashMap<Character, Character>(); // Char, Char 타입 설정
	}
}- Key, Value 2개의 값을 가지고 있으므로 두 개의 타입을 선언해야 함
- HashMap<타입, 타입> 변수명 = new HashMap<타입, 타입>();
HashMap 값 추가하기
- put(Key, Value)를 사용
HashMap<String, String> hm = new HashMap<String, String>(); // HashMap 선언

// 값 추가
hm.put("1", "Hello1");
hm.put("2", "World2");
hm.put("3", "Hello3");
hm.put("4", "World4");
hm.put("2", "WorldWorld2");

System.out.print(hm); // 결과 출력
HashMap 값 삭제하기
- remove(Key) 메서드를 사용
- clear()메서드를 사용하면 HashMap의 모든 키 값을 삭제
HashMap<String, String> hm = new HashMap<String, String>(); // HashMap 선언

// 값 추가
hm.put("1", "Hello1");
hm.put("2", "World2");
hm.put("3", "Hello3");
hm.put("4", "World4");

System.out.println(hm); // 결과 출력

hm.remove("3");
System.out.println(hm); // 결과 출력

hm.clear();
System.out.println(hm); // 결과 출력
HashMap 크기 구하기
- size() 메서드를 사용
HashMap<String, String> hm = new HashMap<String, String>(); // HashMap 선언

// 값 추가
hm.put("1", "Hello1");
hm.put("2", "World2");
hm.put("3", "Hello3");
hm.put("4", "World4");

System.out.println(hm); // 결과 출력
System.out.println("Size : " + hm.size());
HashMap 값 출력하기
[첫 번째 방법]
- 향상된for문을 사용
- or(Map.Entry<타입, 타입> 변수명 : entrySet()) 을 사용하여 HashMap을 반복문을 실행
- e.getKey(), e.getValue() 메서드를 차례대로 사용하여 HashMap의 Key값과 Value값을 가져올 수 있음
HashMap<String, String> hm = new HashMap<String, String>(); // HashMap 선언
// 값 추가
hm.put("1", "Hello1");
hm.put("2", "World2");
hm.put("3", "Hello3");
hm.put("4", "World4");
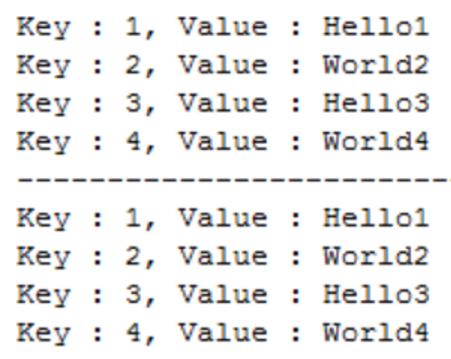
for(Map.Entry<String, String> e : hm.entrySet())
System.out.println("Key : " + e.getKey() + ", Value : " + e.getValue());
[두 번째 방법]
- Iterator방식을 사용
HashMap<String, String> hm = new HashMap<String, String>(); // HashMap 선언

// 값 추가
hm.put("1", "Hello1");
hm.put("2", "World2");
hm.put("3", "Hello3");
hm.put("4", "World4");

Iterator<Entry<String, String>> iter = hm.entrySet().iterator();
while(iter.hasNext()) {
		Map.Entry<String, String> entry = iter.next();
		System.out.println("Key : " + entry.getKey() + ", Value : " + entry.getValue());
}

System.out.println("-----------------------------");

Iterator<String> iter2 = hm.keySet().iterator();
while(iter2.hasNext()) {
		String key = iter2.next();
		System.out.println("Key : " + key + ", Value : " + hm.get(key));
}
'CS 지식 > [자료구조]' 카테고리의 다른 글
| [자료구조] 빅오 표기법(big-O notation) (1) | 2023.10.20 |
|---|---|
| [자료구조] 자료구조 (1) | 2023.10.20 |
| [자료구조] 해시(Hash) (0) | 2023.07.19 |
| [자료구조] 이진 탐색 트리(Binary Search Tree) (0) | 2023.07.19 |
| [자료구조] 트리(Tree) (0) | 2023.07.19 |