의존성 추가
- Gradle
implementation 'org.springframework.boot:spring-boot-starter-mail'- Maven
<dependency>
    <groupId>org.springframework.boot</groupId>
    <artifactId>spring-boot-starter-mail</artifactId>
</dependency>
⇒ 만약 의존성을 추가했는데도 Service 코드 작성 후 에러가 생긴다면 JavaMail API jar을 추가해보기!

Google SMTP
Google SMTP 비밀번호 생성
- 구글 로그인 후 [계정 관리] - [보안] - [2단계 인증] 설정
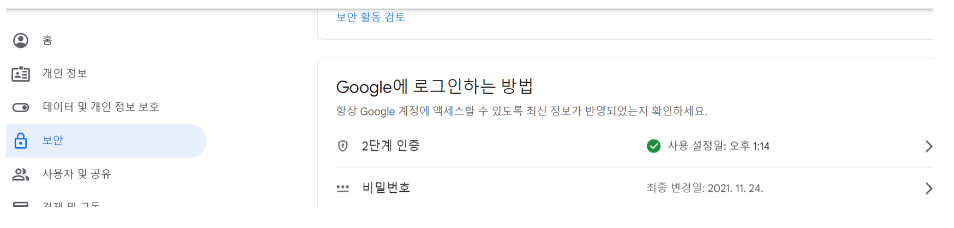
2. [앱 비밀번호] - [메일] - [사용할 기기] 생성
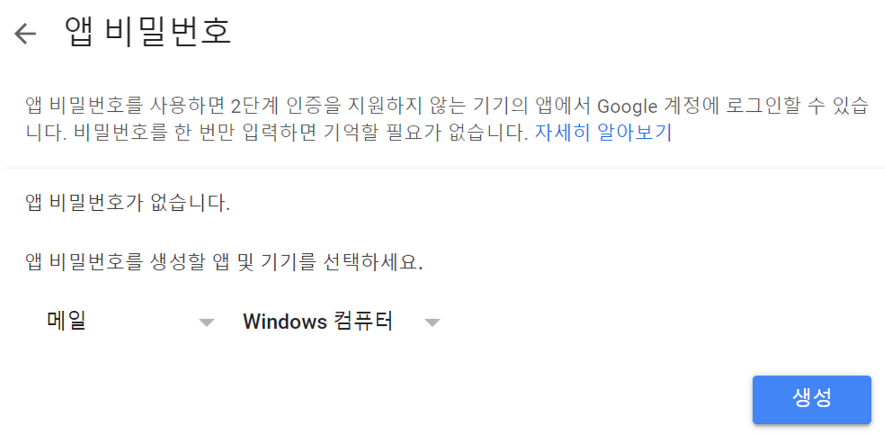
3. 생성 버튼 클릭하면 비밀번호가 생성됨 → 복사하여 spring.mail.password 에 넣어주면 된다.
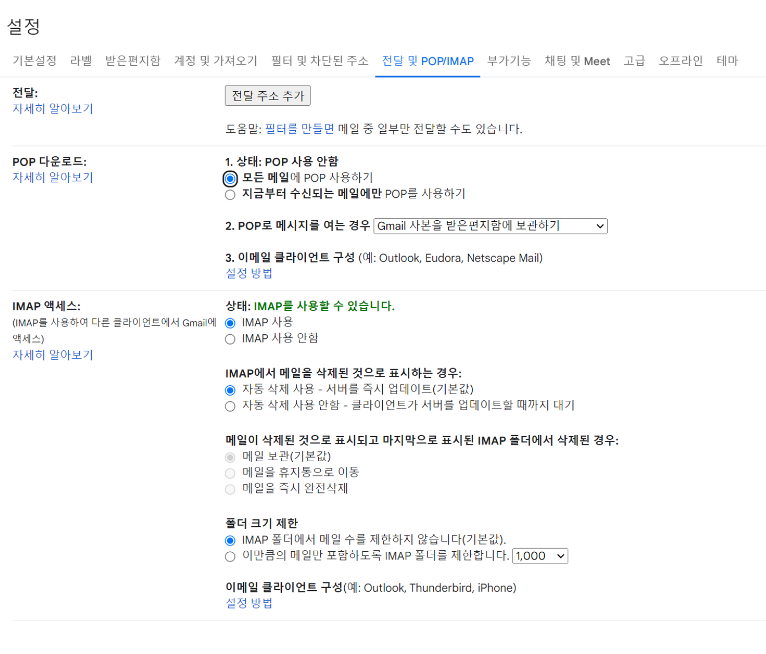
4. Gmail [설정] - [전달 및 POP/IMAP]
application.properties or application.yml
- Google SMTP는 465 또는 587 포트 번호를 사용할 수 있다고 한다.
- application.properties
spring.mail.host=smtp.gmail.com
spring.mail.port=465
spring.mail.username=[본인이 사용할 이메일]
spring.mail.password=[생성된 비밀번호]
spring.mail.properties.mail.smtp.auth=true
spring.mail.properties.mail.smtp.timeout=5000
spring.mail.properties.mail.smtp.starttls.enable=true- application.yml
spring:
  mail:
    # Google smtp server 사용
    host: smtp.gmail.com
    port: 587
    username: xxxx #앱 비밀번호 발급받은 google 계정
    password: xxxx #발급받은 앱 비밀번호
    properties:
      mail:
        smtp:
          starttls:
            enable: true
          auth: true
Controller
private final EmailService emailService;
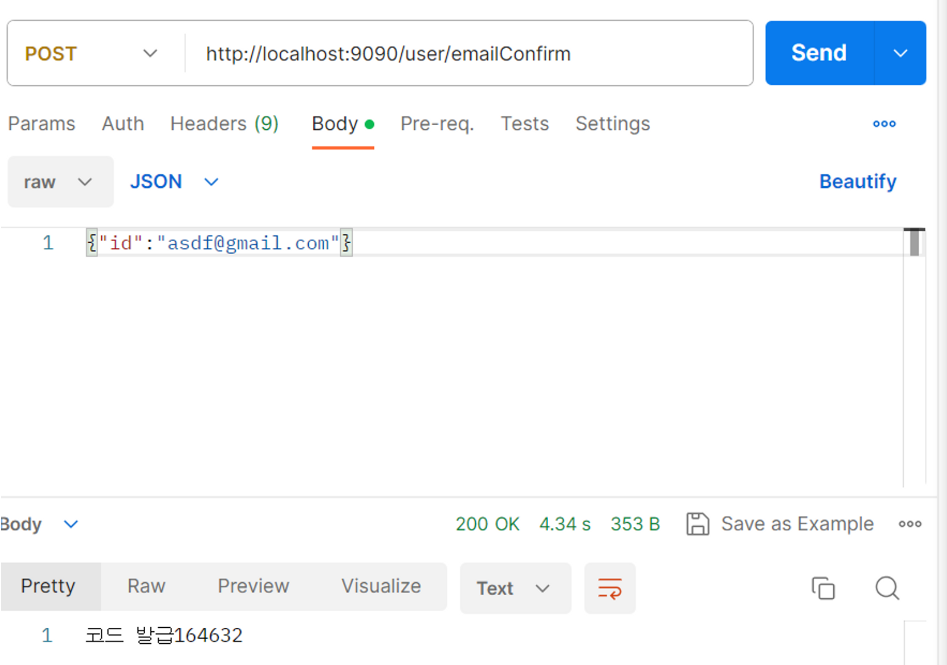
@PostMapping("/emailConfirm")
public String mailConfirm(@RequestBody JoinRequest joinRequest) {
int num = emailService.sendEmail(joinRequest.getId());
return "코드 발급" + num;
}
Service
import lombok.RequiredArgsConstructor;
import org.springframework.mail.javamail.JavaMailSender;
import org.springframework.stereotype.Service;
import jakarta.mail.internet.MimeMessage;

@Service
@RequiredArgsConstructor
public class EmailService {

    private final JavaMailSender javaMailSender;  // 의존성 주입을 통해 필요한 객체를 가져옴
    private static final String senderEmail= "이메일 입";
    private static int number;  // 랜덤 인증 코드

    // 랜덤 인증 코드 생성
    public static void createNumber() {
        number = (int)(Math.random() * (90000)) + 100000;// (int) Math.random() * (최댓값-최소값+1) + 최소값
    }

    // 메일 양식 작성
    public MimeMessage createMail(String mail){
        createNumber();  // 인증 코드 생성
        MimeMessage message = javaMailSender.createMimeMessage();

        try {
            message.setFrom(senderEmail);   // 보내는 이메일
            message.setRecipients(MimeMessage.RecipientType.TO, mail); // 보낼 이메일 설정
            message.setSubject("[WalkingMate] 회원가입을 위한 이메일 인증");  // 제목 설정
            String body = "";
            body += "<h1>" + "안녕하세요." + "</h1>";
            body += "<h1>" + "Walking Mate 입니다." + "</h1>";
            body += "<h3>" + "회원가입을 위한 요청하신 인증 번호입니다." + "</h3><br>";
            body += "<h2>" + "아래 코드를 회원가입 창으로 돌아가 입력해주세요." + "</h2>";

            body += "<div align='center' style='border:1px solid black; font-family:verdana;'>";
            body += "<h2>" + "회원가입 인증 코드입니다." + "</h2>";
            body += "<h1 style='color:blue'>" + number + "</h1>";
            body += "</div><br>";
            body += "<h3>" + "감사합니다." + "</h3>";
            message.setText(body,"UTF-8", "html");
        } catch (Exception e) {
            e.printStackTrace();
        }

        return message;
    }

    // 실제 메일 전송
    public int sendEmail(String userId) {
        // 메일 전송에 필요한 정보 설정
        MimeMessage message = createMail(userId);
        // 실제 메일 전송
        javaMailSender.send(message);

        // 인증 코드 반환
        return number;
    }
}
Test

참고
'Web & Android > SpringBoot' 카테고리의 다른 글
| [SpringBoot] Bean (0) | 2023.10.13 |
|---|---|
| [SpringBoot] 스케줄링 (1) | 2023.10.13 |
| [SpringBoot] Lombok (1) | 2023.08.18 |
| [SpringBoot] HTTP form에서 put, delete 사용법 (0) | 2023.08.17 |
| [SpringBoot] Thymeleaf - 날짜 변환 (0) | 2023.08.17 |